How to Choose an Epoxy Floor in Miami: Pricing, Timeline, and Local Case Studies
Choosing an epoxy floor in Miami takes local judgment: humidity, salt air, UV exposure, and hidden prep work are the real cost and longevity drivers. This practical guide walks through epoxy floor miami pricing ranges, realistic timelines, system choices from flake to metallic and polyaspartic, and a contractor checklist with local case studies so you can compare apples to apples.
Why Miami Climate and Site Conditions Matter for Epoxy Floor Selection
Key point: Miami is not average flooring country — humidity, salt air, intense sun, and seasonal rains change which epoxy systems will last and how long installation takes.
Moisture and adhesion: testing before you sign
Practical requirement: insist on documented in-situ relative humidity testing (ASTM F2170) before any final price is set. Too many installs fail because contractors guess instead of testing. A logged RH profile tells you if you need a vapor mitigation layer or different primer.
- Why RH matters: High slab moisture reduces epoxy adhesion and causes delamination.
- What the test gives you: objective pass/fail and a date-stamped report you include in the contract.
- What follows a failed test: vapor barrier or moisture-tolerant system — both add cost and days to schedule.
Salt air and UV: choose primers and topcoats to match exposure
Coastal trade-off: near the ocean, salt accelerates corrosion of embedded metal and shortens primer life. Use corrosion-resistant primers and stainless mechanical anchors for overlays when you are within a few miles of salt spray. For sun-exposed patios use UV-stable topcoats like aliphatic polyurethanes or polyaspartics rather than standard epoxy to avoid yellowing and chalking.
Real-world example: a Coral Gables condo parking deck had elevated RH and salt-staining; the contractor that quoted lowest added no corrosion protection and failed within 18 months. Miami Epoxy Resin LLC ran ASTM F2170 testing, specified a zinc-rich primer and a UV-resistant topcoat, and the client avoided two expensive reworks.
Scheduling note: Miami rainy season (roughly June to October) pushes up slab RH and creates daily humidity windows that lengthen cure times. If you need a fast turnaround for retail or hospitality, pick a polyaspartic system that cures quickly — at a higher material cost — but only after confirming substrate moisture is acceptable.
Practical judgment: paying more for proper prep and the right topcoat up front almost always costs less than fixing adhesion or UV failure later.
Example use case: For a Doral two-car garage that sees occasional coastal breeze but no direct sun, a standard solid epoxy with proper RH testing and stainless anchors is usually fine. For a South Beach rooftop patio exposed to sun and salt, choose a polyaspartic base with an aliphatic UV topcoat and budget extra for moisture mitigation and flexible seals around drains.
Judgment call: insist on local experience. Systems that perform in inland warehouses often fail at the coast because installers skipped corrosion protection or relied on a standard epoxy topcoat. Use a contractor who can point to recent Miami installs and show their RH logs — see our local portfolio at Miami Epoxy Resin LLC.
Takeaway: Treat climate and site conditions as decision drivers, not optional notes. Require RH tests, specify corrosion and UV protection when appropriate, and accept longer schedules or higher material costs rather than gamble on a cheap, fast install that will fail in South Florida conditions.
Epoxy System Types and Miami Use Cases
Practical point: not all epoxy systems are interchangeable — pick the chemistry to match traffic, sun exposure, budget, and how tolerant you are of installation risk.
Common systems and where they belong in Miami
Below are the systems you will actually see quoted in Miami, with a one-line description and the typical Miami application.
| System | Best Miami uses | UV tolerance | Cure speed | Installer sensitivity | Cost tier |
|---|---|---|---|---|---|
| Solid epoxy | Interior commercial spaces, warehouses, garage floors not sun-exposed | Poor | Standard (hours to days) | Low | Budget to mid |
| Flake / chip broadcast | Residential garages, retail areas needing slip resistance and colour | Moderate with correct topcoat | Standard | Low to moderate | Mid |
| Metallic epoxy | Showrooms, hospitality lobbies, boutique retail | Low unless sealed with an aliphatic topcoat | Standard to slow (skill-dependent) | High | Premium |
| Polyaspartic / fast polyurea | Sunlit patios, rooftops, retail needing short closures | High | Very fast (minutes to hours) | Moderate | Premium |
| Epoxy mortar / trowel | Kitchen lines, heavy-load service corridors, industrial bays | Variable | Slower (patching and cure time) | Moderate | Mid to premium |
| Anti-static/ESD epoxy | Electronics, lab, commercial kitchens with specific specs | Variable | Standard | High (testing required) | Specialty |
Trade-off that matters: polyaspartics buy you reopen speed and UV stability but cost more and require tighter temperature controls during application. If a retail owner needs a weekend reopen, polyaspartic is often the right call despite the premium.
On installer skill: metallic systems are showpieces and also show mistakes. Expect a required mockup panel and an experienced crew. If your contractor balks at a 50 to 100 square foot sample, treat that as a signal they lack the skillset for a high-end finish.
Concrete example: a Coconut Grove restaurant kitchen converted to an epoxy mortar floor by Miami Epoxy Resin LLC. The space needed oil resistance and quick chemical cleanability; the crew installed a 1 inch epoxy mortar screed, radius coved corners, and an industrial sealer. The owner reported easier daily cleaning and fewer slip incidents in the first six months.
- Decision rule for owners: if the floor sees direct sun choose UV-stable topcoats or polyaspartic systems; if it sees heavy wheels or impact choose epoxy mortar or thicker film systems.
- Value pick: flake broadcast gives the best balance of appearance, slip resistance, and forgiving installation for most Miami garages and small retail floors.
- Premium pick: reserve metallic finishes for spaces where aesthetics justify the rework risk and the owner can demand mockups and a workmanship warranty.
If you want examples of each system in real Miami projects, review our documented installs on the portfolio page before choosing a contractor or product.
If you must choose one baseline: for most residential garages in Miami, a professionally prepared flake broadcast system delivers the best mix of durability, safety, and cost control.
Realistic Pricing Breakdown for Epoxy Floor Miami Projects
Straight talk: installed price in Miami is dominated by what you cannot see — surface prep, moisture mitigation, and repair — not the pigment or flakes you pick. Contractors who compete on appearance alone usually underquote the real work.
Installed cost bands and how they map to Miami jobs
Typical bands: expect three practical tiers for Miami installs: budget/basic for interior, mid-range decorative (flake/chip) for garages and retail, and premium for metallic or fast-curing polyaspartic systems used where UV resistance or short closures matter. Choose the tier by exposure, required reopen time, and tolerance for rework risk.
- Budget/basic: solid epoxy for interior non-sunlit spaces — lower material cost but vulnerable to UV and high slab moisture unless paired with proper prep
- Mid-range/decorative: flake broadcast systems — best balance of appearance, slip resistance, and forgiving installation for Miami garages and small retail
- Premium: metallic epoxies and polyaspartic systems — higher material and labor cost, needed for showrooms, rooftops, or projects that must reopen fast
Key trade-off: paying more for a moisture mitigation membrane or mechanical repairs up front often avoids a full delamination and a second install that costs considerably more in time and disruption.
Sample line-item quote (realistic example for a 2-car garage, 400 sq ft)
| Line item | Unit | Qty | Unit cost (approx) | Total (approx) |
|---|---|---|---|---|
| Site assessment + ASTM F2170 RH testing | lump | 1 | $250 | $250 |
| Diamond grind / shotblast surface prep | sq ft | 400 | $1.50 | $600 |
| Crack patching & self-leveling skim | lump | 1 | $450 | $450 |
| Primer coat (moisture-tolerant if needed) | sq ft | 400 | $0.75 | $300 |
| Flake broadcast + sealer (mid-range system) | sq ft | 400 | $6.50 | $2,600 |
| Topcoat (aliphatic UV-stable where required) | sq ft | 400 | $1.25 | $500 |
| Labor, masking, cleanup, waste disposal | lump | 1 | $900 | $900 |
| Contingency (hidden repairs / moisture mitigation) | lump | 1 | $500 | $500 |
| Estimated total | $6,000 |
Example use case: a Coconut Grove homeowner paid an installed mid-range flake system for a two-car garage similar to the table above. The quote included an RH test and modest crack repairs; the crew completed work in three days and the owner avoided a costly vapor mitigation step because RH results fell inside tolerance.
Practical insight and judgment: watch contingency line items closely. A low base price that leaves out RH testing or an explicit contingency is likely to become a change order later. Good contractors spell out the failure modes they are protecting against and price them transparently.
If budget forces compromise, spend on prep and corrosion/UV protection first. A cheaper topcoat can be replaced; a failed bond usually requires full removal and reinstall.
Installation Timeline and What Adds Days to the Schedule
Start with reality: the calendar for an epoxy floor job in Miami is driven more by substrate and approvals than by the coating itself. Expect the visible coating work to be quick; the invisible work — testing, prep, repairs, and approvals — is what stretches a project into multiple weeks.
Phases that determine schedule
Break the job into four phases: assessment and testing, surface preparation and repairs, coating application, and post-application cure and handover. Each phase has single failure modes that create outsized delays: a failed moisture test, hidden concrete spalls, required HOA or municipal signoff, or a custom color/matching round that needs a mockup.
- Assessment and testing: Formal RH logs and substrate scans must be completed and appended to the contract. If RH or chloride readings are high, expect mitigation planning to add days or longer.
- Prep and repairs: Diamond grinding, shotblasting, epoxy mortar patches, and drain work are labor-intensive and often done in passes. Hidden voids or corroded embeds can force additional demolition and cure time.
- Application: Primer, base, broadcast, and topcoat passes are scheduled around manufacturer open times. Fast cures compress this, but require stricter environmental controls.
- Cure and return-to-service: Light foot traffic is often possible sooner than full service. Do not assume vehicle or heavy equipment use until manufacturer cure metrics are met.
Practical trade-off: you can buy speed with polyaspartic systems, but they do not eliminate the need for proper prep or moisture mitigation. Paying for fast cure often just shifts cost into premium materials and skilled labor — not out of the prep queue.
Less obvious schedule drivers: supply delays for specialty pigments or aliphatic topcoats, city or HOA approval turnarounds, permitted working-hour restrictions in residential areas, and weather-driven humidity windows. These are the items most contractors forget to calendarize or disclose.
Concrete example: A Brickell boutique requested a metallic epoxy showroom floor with a three-shade custom effect. Miami Epoxy Resin LLC produced a 50 sq ft mockup for client signoff, but the owner requested tweaks and an additional mockup — that approval loop added several working days. On top of that, on-site RH readings required a moisture-tolerant primer, which added another preparation pass before the metallic base could be applied. The visible coating was applied quickly once approvals and prep were complete, but the project schedule grew because of the approval and mitigation cycles.
Judgment call: demand transparency on sequencing. A contractor who gives a day-by-day plan tied to objective triggers (ASTM F2170 results, moisture thresholds, mockup approval) is more reliable than one offering a single lumped completion date. That level of planning is how you avoid expensive mid-job delays and scope creep.
If timing is critical for a store opening or condo turnover, lock the acceptance criteria (RH pass level, mockup signoff, permitted work hours) into the contract and budget the premium for guaranteed windows.
How to Evaluate Contractors and Get an Accurate Epoxy Floor Quote in Miami
Straight truth: the cheapest written price is almost never the most accurate. To get a reliable epoxy floor miami quote you must force contractors to price the same, measurable scope and to document the hidden risks they are protecting against.
What to require before you accept a bid
Baseline deliverables: ask every bidder to include these items in their estimate: a dated site assessment, concrete condition notes, an in-situ moisture report with readings and locations, exact product SKUs for primer/base/topcoat, specified film builds or mil thickness, mockup/sample panel policy, and a written cure schedule tied to RH or temperature thresholds.
- Ask for local references: recent Miami installs (photos + contact) in comparable exposure (coastal, rooftop, garage).
- Insurance and licensing: Florida general liability limits and worker compensation proof.
- Product transparency: exact brand and SKU for each coat and the manufacturer technical datasheets.
- Surface prep method: diamond grind, shotblast, or other; include abrasive size and profile target.
- Moisture testing: provide the in-situ relative humidity log and specify pass criteria or mitigation plan.
- Warranty details: manufacturer material warranty plus a clearly stated installer workmanship term and what voids it.
- Mockup requirement: size, location, and acceptance criteria for aesthetic or metallic systems.
- Scope exclusions and change orders: list items that would trigger extra cost (hidden spalls, drains, failed RH).
- Schedule and limits: realistic start/finish dates plus added days for failed tests or approvals.
- Cleanup and disposal: how waste, masking, and site protection are handled and billed.
Practical trade-off: a contractor who gives a short, low flat price but refuses to include SKUs, RH logs, or a mockup is shifting risk to you. Paying 10 to 20 percent more up front for explicit scope rarely costs more than a remediation later.
What good bids look like: two proposals should differ only in system (flake vs polyaspartic vs metallic), not in whether prep or testing will happen. If you cannot line-item-match bids, ask the contractors to revise until they do.
Concrete example: a Wynwood retail fit-out collected three bids for a 750 sq ft showroom. The low bid excluded an RH test and specified a generic epoxy topcoat; the mid bid included RH testing and an aliphatic topcoat; the high bid used a polyaspartic with a written reopen window. The owner chose the mid bid after confirming the RH log showed borderline moisture that would have voided the low bidder’s work within months.
If a contractor will not put the moisture test, product SKUs, and mockup requirement in writing, treat that as a deal-breaker.
Miami Regulations, HOAs, Permits, Warranties, and Maintenance
Start with the law: permits and local code are not optional for many Miami epoxy jobs. Commercial installations, exterior patios or rooftop surfaces that alter drainage or cover structural concrete commonly trigger building permits and inspections. Failing to pull required permits can force removal, fines, or insurance denials after a storm or a claim.
Permits and municipal checks
Before you sign, verify permit needs with your municipal building department or Miami-Dade County. Permits are most likely when the scope includes exterior waterproofing, changes to slope/drainage, or work at multi-family common areas. Ask the contractor to list the exact permit numbers and to show dated approvals; if they refuse, escalate to the authority having jurisdiction.
HOA approvals: what to prepare
- Compile a submission packet: product technical datasheets, a 12×12 sample panel or photo mockup, installer license and proof of insurance, estimated schedule, and a short maintenance plan.
- Expect design limits: many associations regulate color, sheen, and edge transitions. Get written sign-off for the exact SKU and sheen you will use — verbal approvals do not hold up when disputes occur.
- Allow time: start the HOA process early. Board reviews, architectural committee meetings, and required neighbor notices can add multiple weeks.
Concrete example: A Coral Gables condo association required a low-sheen finish and a sample panel before approving work on a common corridor. The contractor that already had a finished 24×24 mockup and labeled datasheets secured approval in one committee meeting; another bidder had to return twice with revisions and lost the job due to schedule blowout.
Warranties you can actually enforce
Separate material warranties from installer workmanship guarantees. Don’t accept a bundled, vague promise. Require that the installer: attach the in-situ moisture report to the warranty, list conditions that void coverage (for example, unreported standing water, use of incompatible cleaners), and define the remedy (repair or reapply versus pro-rated refunds). If the warranty depends on regular maintenance, spell out the maintenance log requirements.
Practical judgment: warranties are only useful when they include objective triggers and documentation. A manufacturer will deny a claim if there is no RH test or if the installer used an unapproved topcoat — insist these items are written into both the quote and the warranty paperwork.
Maintenance realities for Miami conditions
Routine care prevents small issues from becoming warranty claims. Use a neutral-pH cleaner, avoid solvent-based strippers, and do not use high-pressure washers near seams or drains. After heavy storms or periods of salt spray, do a visual inspection of edges, drains, and caulked joints and photograph problems immediately to preserve a warranty record.
Trade-off to accept: higher-performance topcoats (UV-stable, abrasion-resistant) add upfront cost but reduce maintenance frequency and preserve warranties in sun- and salt-exposed locations. Skimping on the topcoat is a common economy that backfires in coastal Miami.
Require the RH test report, product SKUs, and HOA/permit approvals to be attachments to the contract and the warranty. If any of those are missing, you are buying risk, not protection.
Next consideration: once permits, HOA sign-offs, and warranty language are in place, lock in a simple maintenance schedule and a photographic log with dates. That discipline is the single most effective way to keep your warranty valid and to avoid expensive disputes down the road.
Local Case Studies Featuring Miami Epoxy Resin LLC
Concrete point: real Miami projects show that the difference between a successful epoxy floor and a premature failure is less about the finish and more about how the job was scoped, documented, and executed. These three case studies illustrate how Miami Epoxy Resin LLC handled common site realities for an epoxy floor miami client base — and what that means for your quote and schedule.
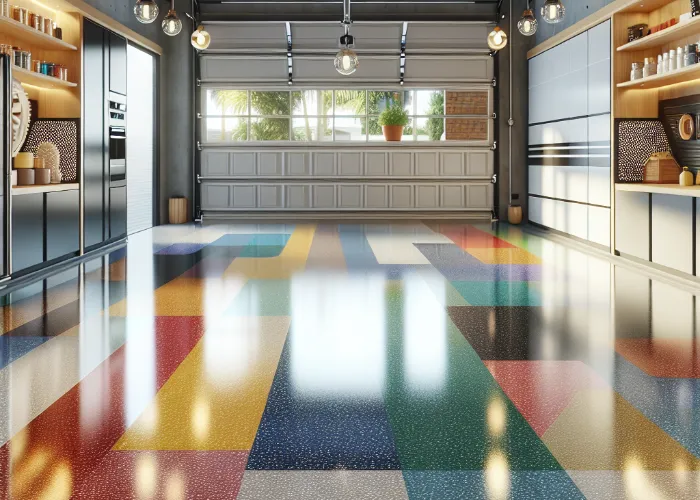
Case Study 1 — Doral: Residential Two-Car Garage (Decorative Flake)
Project snapshot: 420 sq ft, interior garage, flake broadcast system using a Sherwin-Williams base and an aliphatic topcoat for moderate UV resistance. The slab had hairline cracking and oil staining on arrival.
Scope and result: crew performed shotblasting, targeted epoxy mortar patching, and a full flake broadcast. Timeline ran three working days from prep to final topcoat. Ballpark installed cost landed in the low thousands range. Measurable outcome: client reported a noticeable drop in daily cleaning time and a slip rating improvement on entry areas.
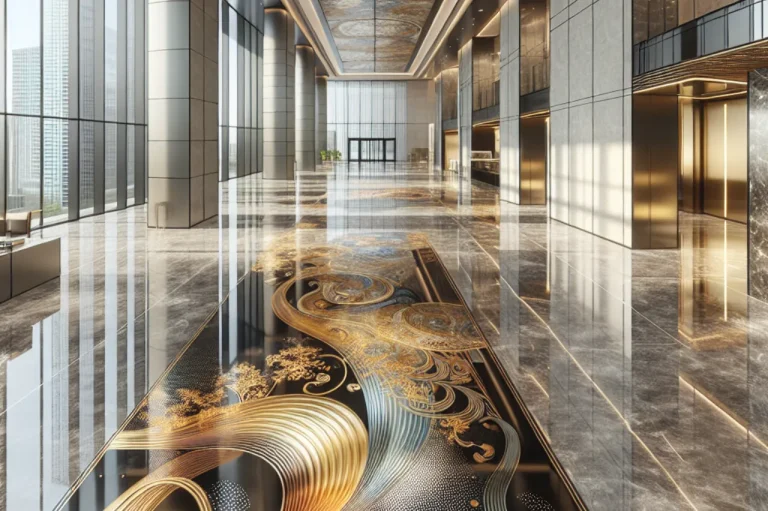
Case Study 2 — Brickell: Boutique Showroom (Metallic Epoxy)
Project snapshot: 750 sq ft showroom floor, multi-shade metallic effect with an aliphatic protective coat. Owner required a precise aesthetic; project required a 50 sq ft mockup and two approval rounds.
Scope and result: after mockup signoff, installers used a skilled crew to lay the metallic base and controlled broadcast technique, then sealed with UV-stable topcoat. Actual visible work took four days, but approvals and an unexpected moisture-tolerant primer pass extended the schedule to about ten days. Ballpark cost was a mid-range commercial spend. Judgment: metallic finishes reward skilled crews and strict mockup discipline — skip the mockup and you invite expensive rework.
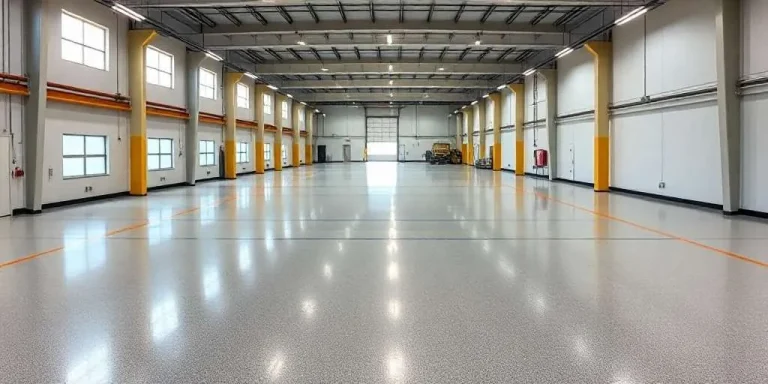
Case Study 3 — Hialeah: Light Industrial Bay (Epoxy Mortar)
Project snapshot: 3,200 sq ft service bay used for light trucking and parts staging. Client needed abrasion resistance, coved corners, and quick chemical cleanability.
Scope and result: substrate had localized delamination and elevated moisture in one quadrant. Miami Epoxy Resin LLC implemented targeted removal, vapor mitigation in the affected area, a 3/4 inch epoxy mortar screed, and a solvent-free urethane topcoat. The mitigation added two weeks to schedule; the owner accepted the delay and avoided a later outage. Outcome: reduced downtime for the client and lower maintenance calls reported in the first year.
- Practical insight: mockups and documented substrate tests save money in practice, not just on paper. They expose aesthetic and moisture risks before full installation.
- Limitation to accept: even with correct chemistry, coastal exposure and hidden slab issues will increase cost and time — contractors who promise a fixed short window without contingencies are taking your risk.
Where to see these projects: view annotated photos and project notes on the company portfolio at Miami Epoxy Resin portfolio to inspect mockups, before/after shots, and the exact product callouts they used.
Next consideration: when you request an estimate, ask to see the exact mockup photo and the RH log for a comparable past job — a contractor who provides those quickly has already removed the biggest unknowns.